Introduction
Laravel is a popular PHP framework that helps you build web applications with different frontend frameworks like React.js. You can also implement a decoupled application by only writing the APIs.
Whether it’s a monolith or API, leverage the power of Kubernetes so your application can perform under high traffic. By taking care of the application availability, Kubernetes efficiently utilizes resources and can scale up or down based on demand.
In this blog, you’ll learn how to deploy a Laravel application using Kubernetes.
Before we dive in, refer to this template I’ve prepared, which will help you with deployment.
Priorities
We will begin by deploying the application in a local Kubernetes cluster using minikube.
With Nginx as the web server, we’ll consider a simple Laravel application that consists of a MySQL database for storing the data.
It is easy to set up if you do not have minikube installed on your machine. Select the options based on your machine's configuration.
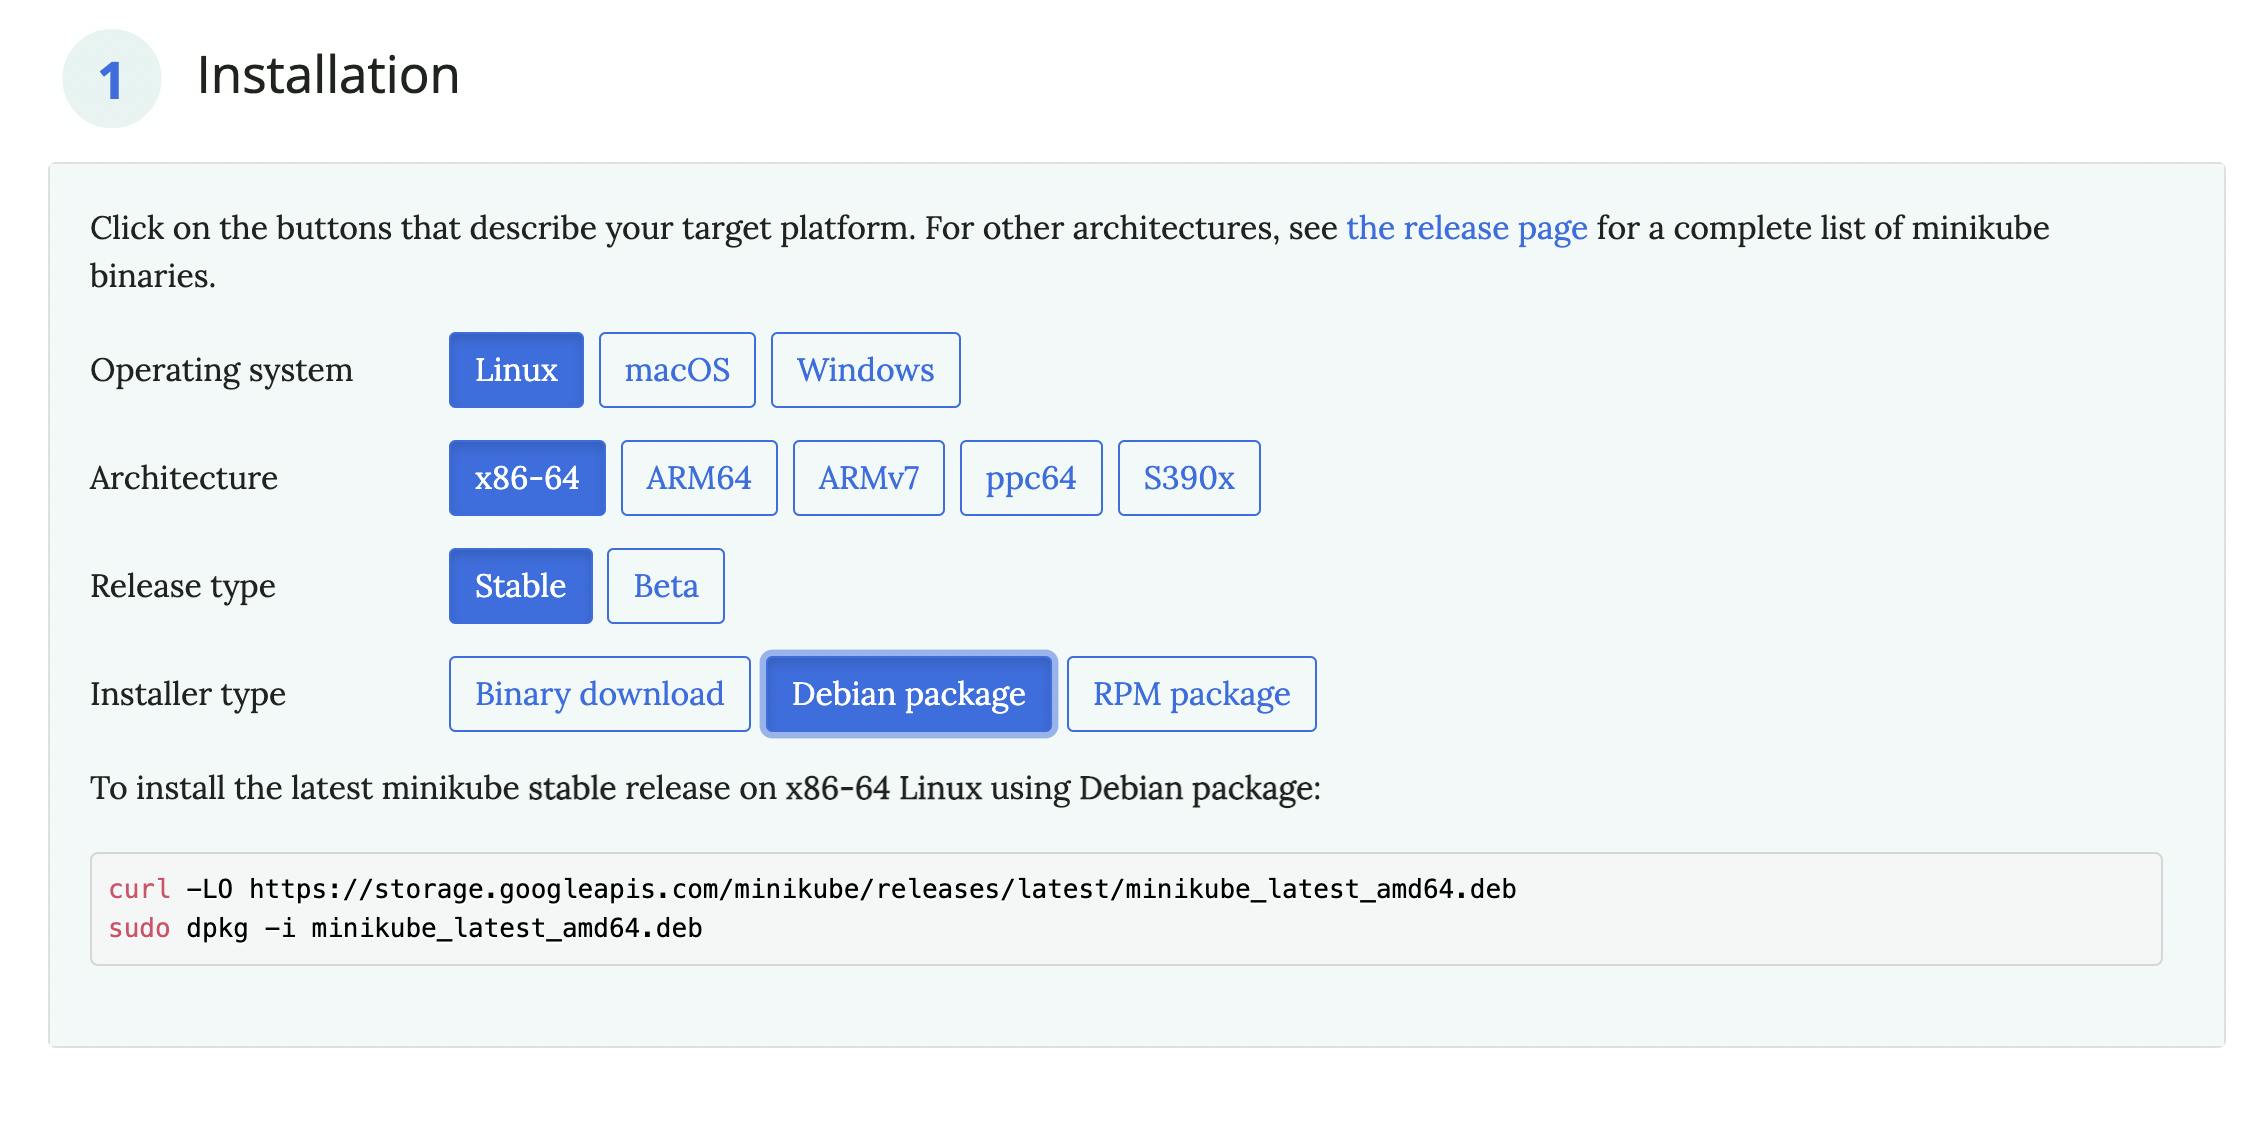
Execute the following command:
minikube start
It will create the cluster in your machine.
We will require a few minikube addons for this exercise.
minikube addons enable ingress
minikube addons enable metrics-server
ingress allows you to route requests from your machine to the cluster, making the application available to you.
metrics-server collects metrics from the pods and exposes them to the Kubernetes API server, which is necessary for pod scheduling and autoscaling.
Restart the minikube cluster once you have enabled the addons.
minikube stop
minikube start
Containerize The Application
ARG PHP_EXTENSIONS="apcu bcmath pdo_mysql redis imagick gd"
FROM thecodingmachine/php:8.1-v4-fpm as php_base
ENV TEMPLATE_PHP_INI=production
WORKDIR /var/www/html
COPY --chown=docker:docker . .
COPY --chown=docker:docker .env.example .env
RUN composer install --optimize-autoloader
RUN php artisan key:generate
The Dockerfile can vary based on your application requirements.
Build the Docker image. It ensures that the image is available to the minikube cluster. minikube runs its Docker environment. Therefore, we must ensure that the deployment happens in the right environment. You can point to the minikube's Docker environment by executing the below in the terminal.
eval $(minikube -p minikube docker-env)
Followed by the command for building an image:
docker build . --tag=ci-k8s
You can choose any image name.
Enter The Kubernetes
Let’s create a few entities in Kubernetes that will deploy the application. You’ll need to make sure it’s scalable and publicly available.
You can prepare the entities one by one. However, we will use helm to prepare the boilerplate entities. It helps in packaging the application deployment and simplifies the deployment.
We will modify those boilerplate entities as per our requirements.
If you don’t have helm, install it from here. Once done, prepare the boilerplate configuration by executing:
helm create chart
It will create a directory named chart with the files like this. Feel free to provide any name while creating the chart.
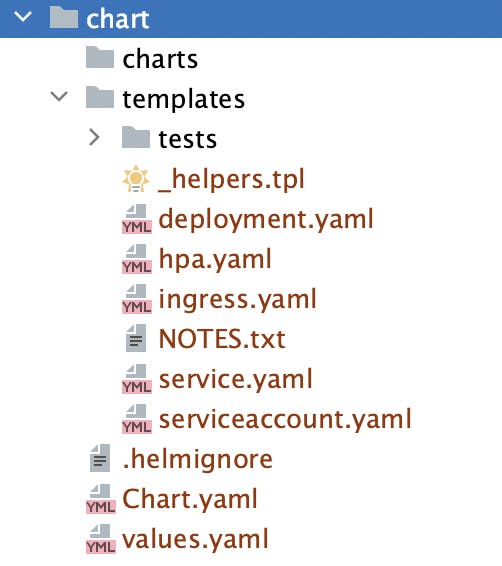
You will notice the various entities involved in deploying the application one by one.
Prerequisite
Helm provides a templating feature. What does that mean? It can specify configurations like the number of replicas inside a template file. The entities will use the template to get the values. You will see those template files.
values.yml
The values.yml contains the specifications like the resource you want to give to each pod, the number of pod replicas to maintain, etc. They will vary based on availability factors, cost, and expected traffic.
_helpers.tpl
The _helpers.tpl define templates that you can use in the entities.
Chart.yaml
The Chart.yaml specifies the chart metadata like its name, version, etc.
Now, let's get to the entities.
Volumes
We will require two volumes in this exercise—for codebase and database. In production, you might want to go with database services like AWS RDS, DigitalOcean, etc. Why? They handle the necessary tasks like maintaining backups and allocating resources.
The volume specifications are mentioned in storage.yml.
Configurations
Specifying how to handle PHP requests in Nginx is a must. Let’s use ConfigMap for it. nginx_config.yml contains those specifications.
Deployment
The Deployment entity is responsible for deploying the application and its dependencies. We will have three deployments: phpfpm, Nginx, and database (MySQL). You’ll be able to view them in deployment.yaml.
The nginx deployment relies on the configuration entity.
Services
We will use the Service entity to expose the container ports. The service.yaml specifies how you can do it.
Ingress
The Ingress entity makes the pods publicly available. It routes the traffic from the internet to the pod and vice-versa. The ingress.yaml file explains how you can do it.
Autoscaling
The HorizontalPodAutoscaler entity enables your application to serve under traffic. You can choose between vertical or horizontal scaling of your pods. For this, let’s go with horizontal scaling.
hpa.yaml specifies the threshold and the maximum number of replicas to maintain. The pod scheduler creates a new pod if the resource utilization crosses the threshold.
The database and the phpfpm pods may consume more CPU and memory based on the traffic. Therefore, we have configured the autoscalers for them.
The specifications minReplicas, maxReplicas, and metrics will vary by application and business requirement. Also, consider the resources available in the node.
Once you create all the required entities, the chart directory will look like this:
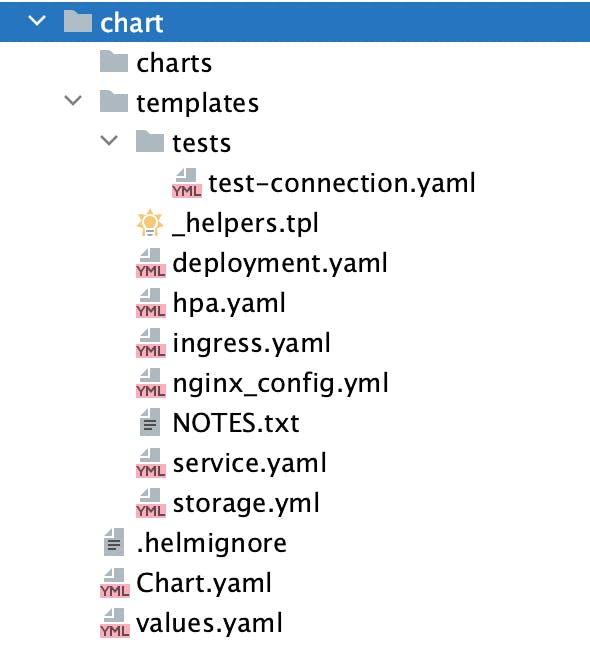
Let's see how we can deploy the application.
Deploying The Application
Create The Cluster
minikube start

Enable Tunneling
It will route the traffic from your machine to the cluster.
minikube tunnel

It will request authorization as you have exposed port 80.
Install The Chart
Installing the chart will initiate the deployment, and the API server will instantiate the entities. Before installation, replace the database secrets with the actual values. We specified them in values.yaml.
dbRootPassword: "test"
dbName: "test"
dbUser: "test"
dbPassword: "test"
Specify the correct secrets as environment variables.
export DB_ROOT_PASSWORD=rootpass DB_NAME=db DB_USER=main DB_PASSWORD=password API_KEY=samplekey
To validate whether there are issues with the entities, execute the following from the project root:
helm install --set dbRootPassword=$DB_ROOT_PASSWORD --set dbName=$DB_NAME --set dbUser=$DB_USER --set dbPassword=$DB_PASSWORD --set apiKey=$API_KEY laravel-k8s chart/ --dry-run --debug
It should output the entities with the exact specifications. If you see an error, something is wrong.
It is time to install the chart.
helm install --set dbRootPassword=$DB_ROOT_PASSWORD --set dbName=$DB_NAME --set dbUser=$DB_USER --set dbPassword=$DB_PASSWORD --set apiKey=$API_KEY laravel-k8s chart/
laravel-k8s is the name of the chart. You can name it something else.
chart/ is the location of the directory that contains all the entities.
Kubernetes Dashboard
minikube comes with the Kubernetes dashboard. You can open it by executing:
minikube dashboard
It might take time to open. Once it does, you will see:
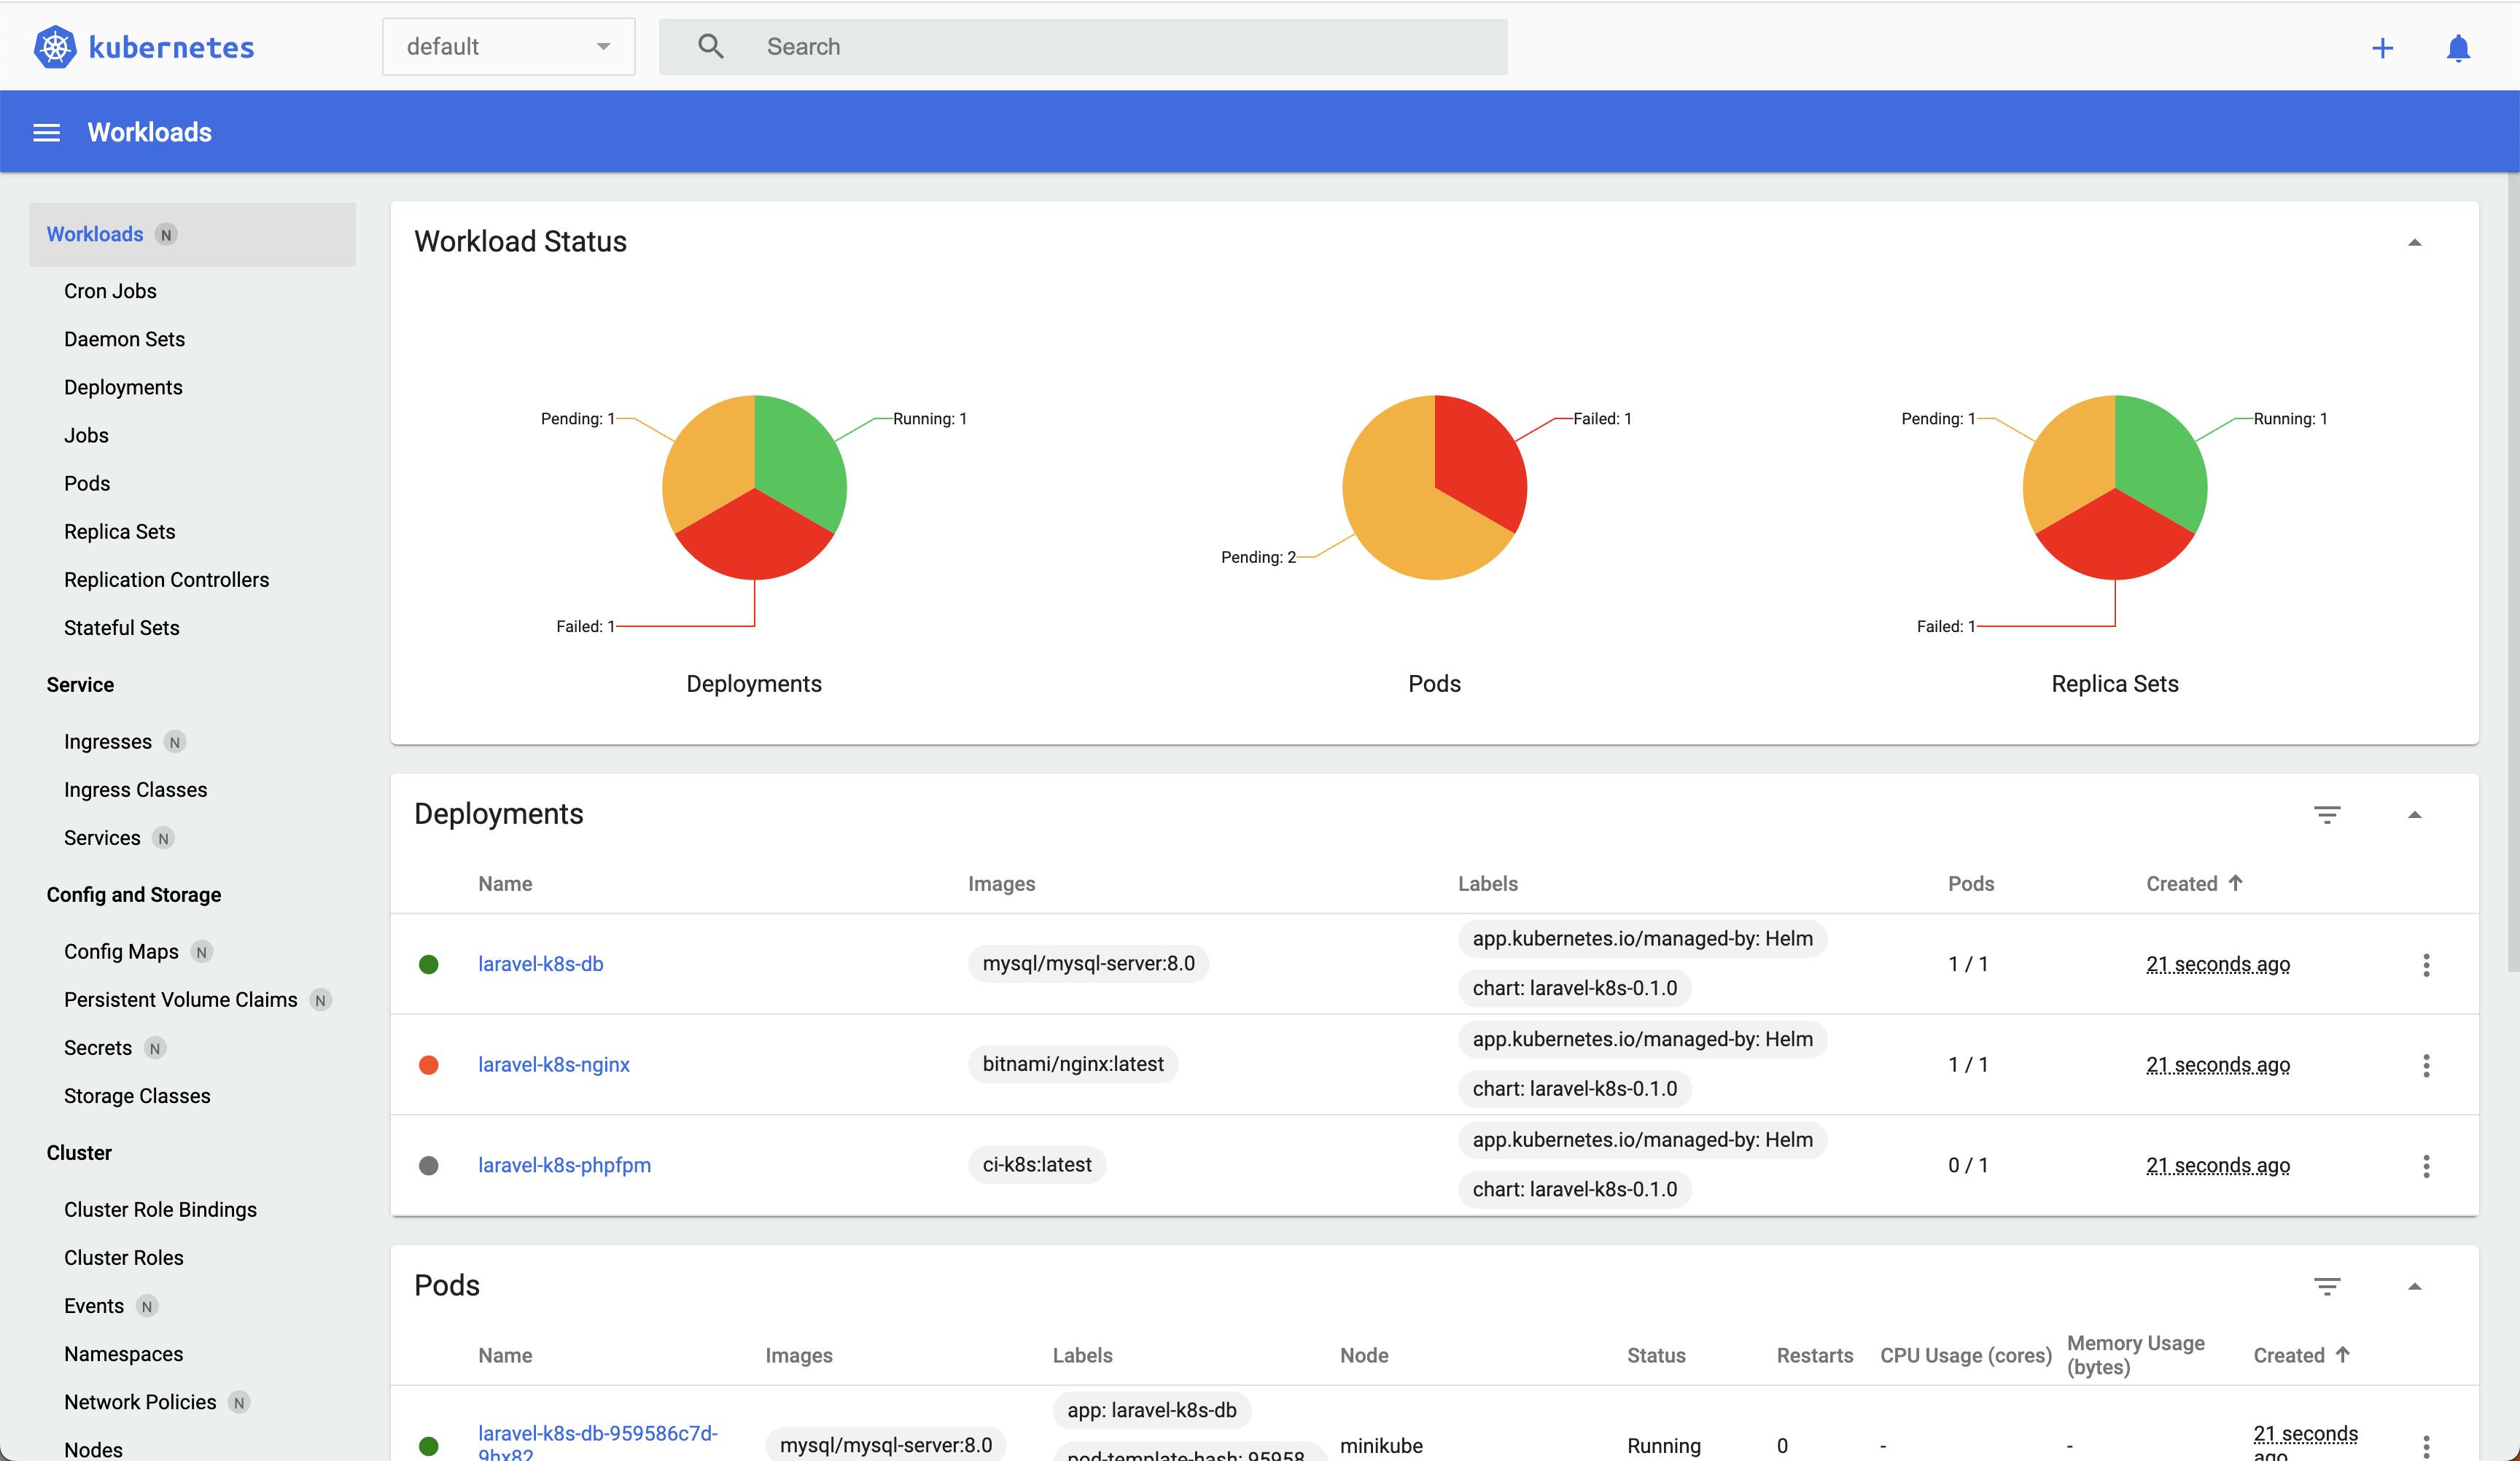
It specifies that the pods are starting up. Once the pods are ready, they are green.
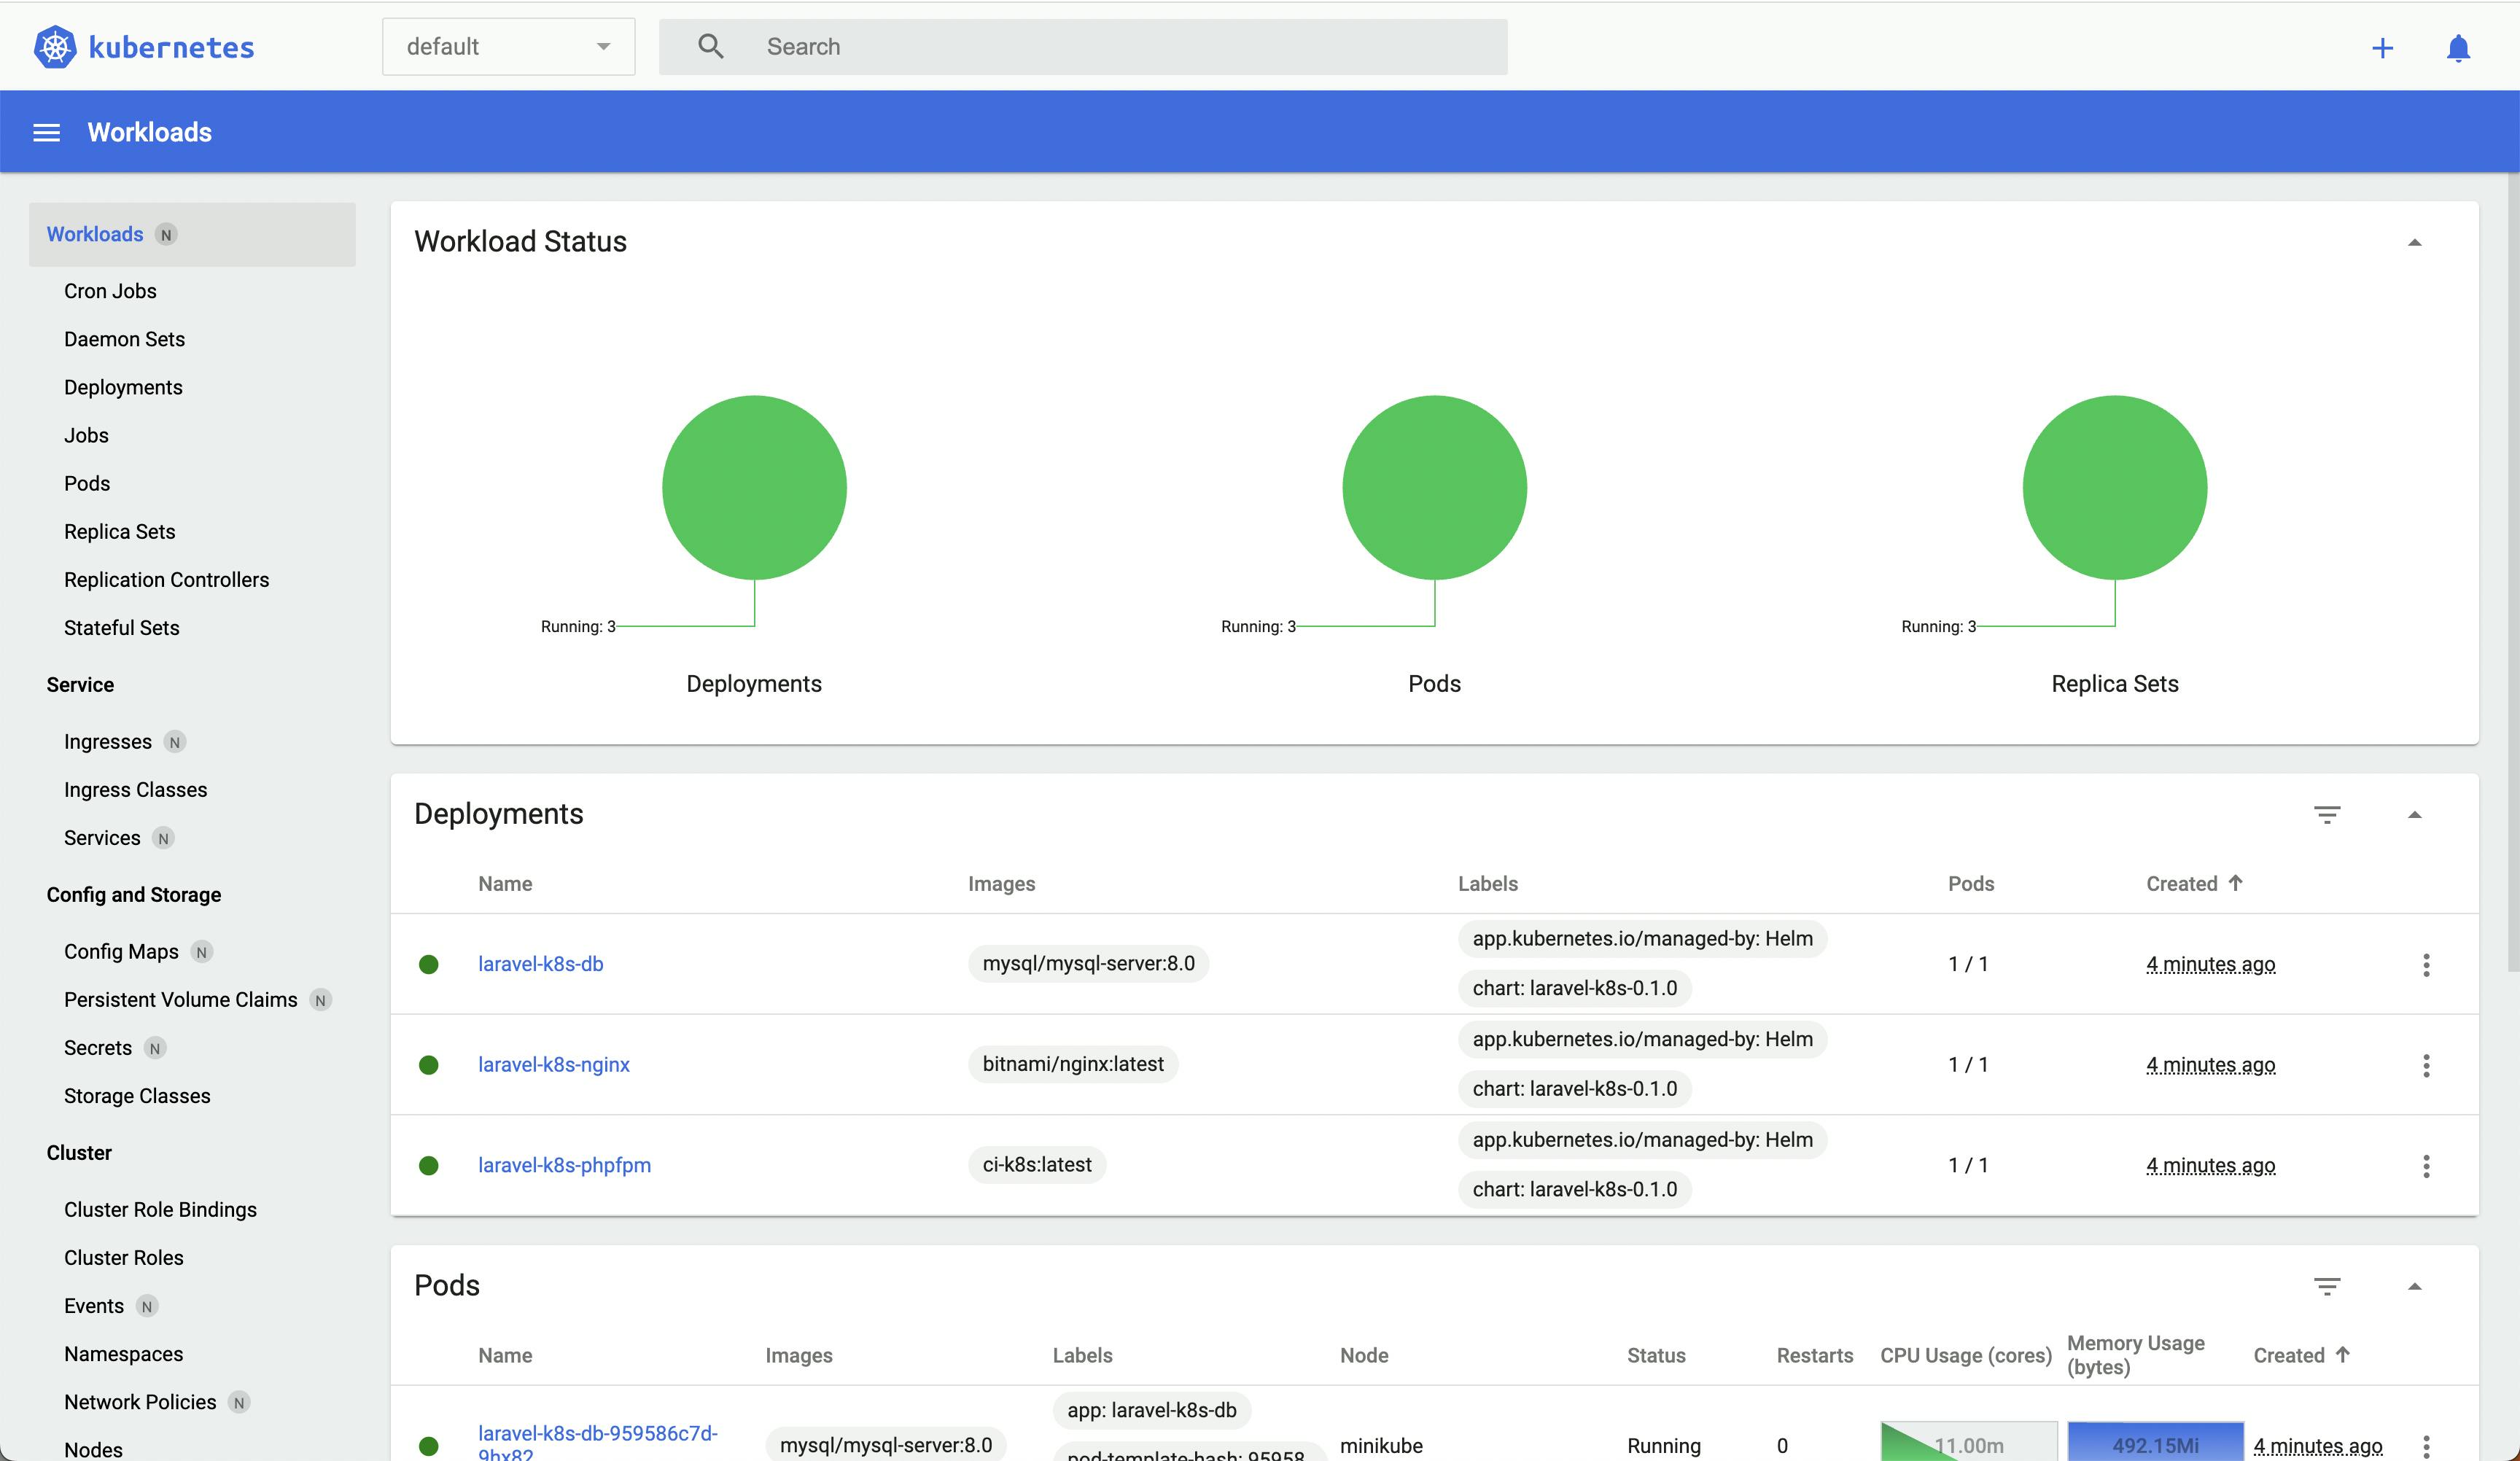
Verify
To check whether the application is running, initiate a curl request from your machine.
curl -v http://localhost/
You should see a 200 OK response.
Wondering how the pods can listen to the requests from your machine? Because you enabled the tunneling and ingress entity. It means your machine's port 80 can communicate with the cluster.
Autoscaling In Action
Let's say the application has an endpoint that does some computational tasks. We will simulate the traffic using ApacheBench.
ab -c 2 -n 5000 http://localhost/api/calc-daily-average-power-consumption
Kubernetes relies on the metrics server to gather data from the pods. Based on the data and the specified threshold, it schedules the pods.
Once you have executed the command, it takes a while for the new pod to come online.
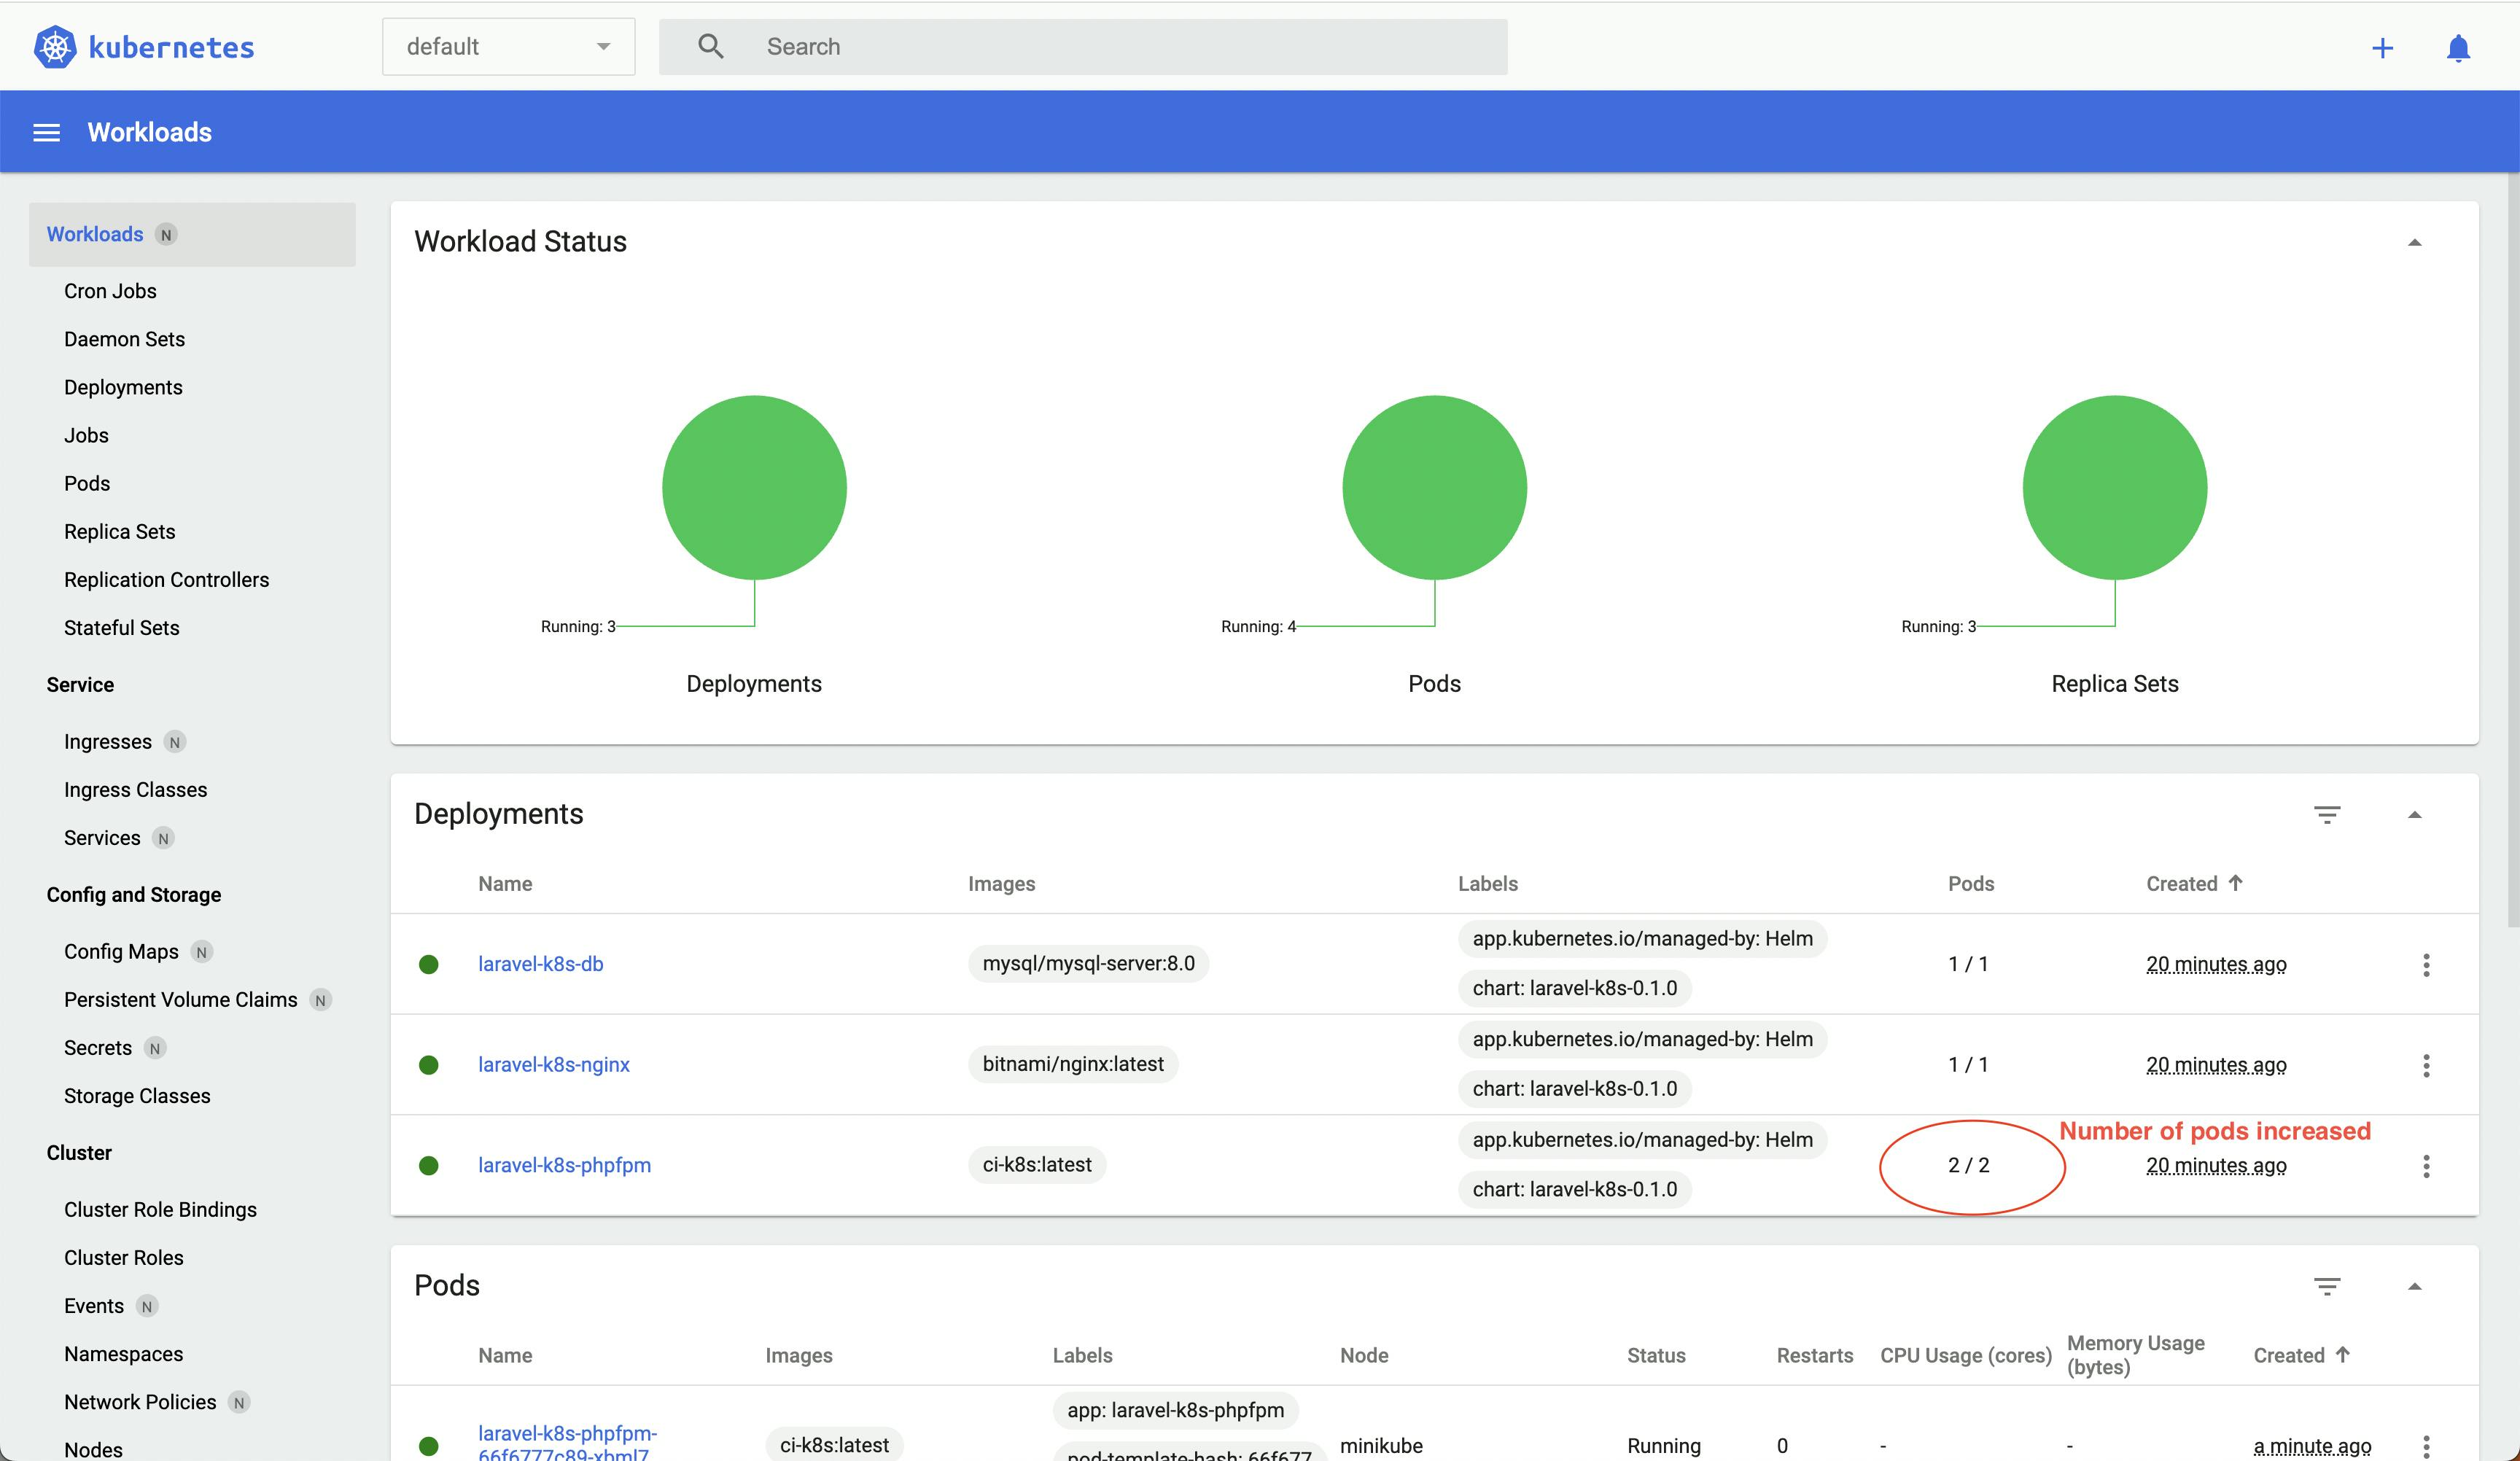
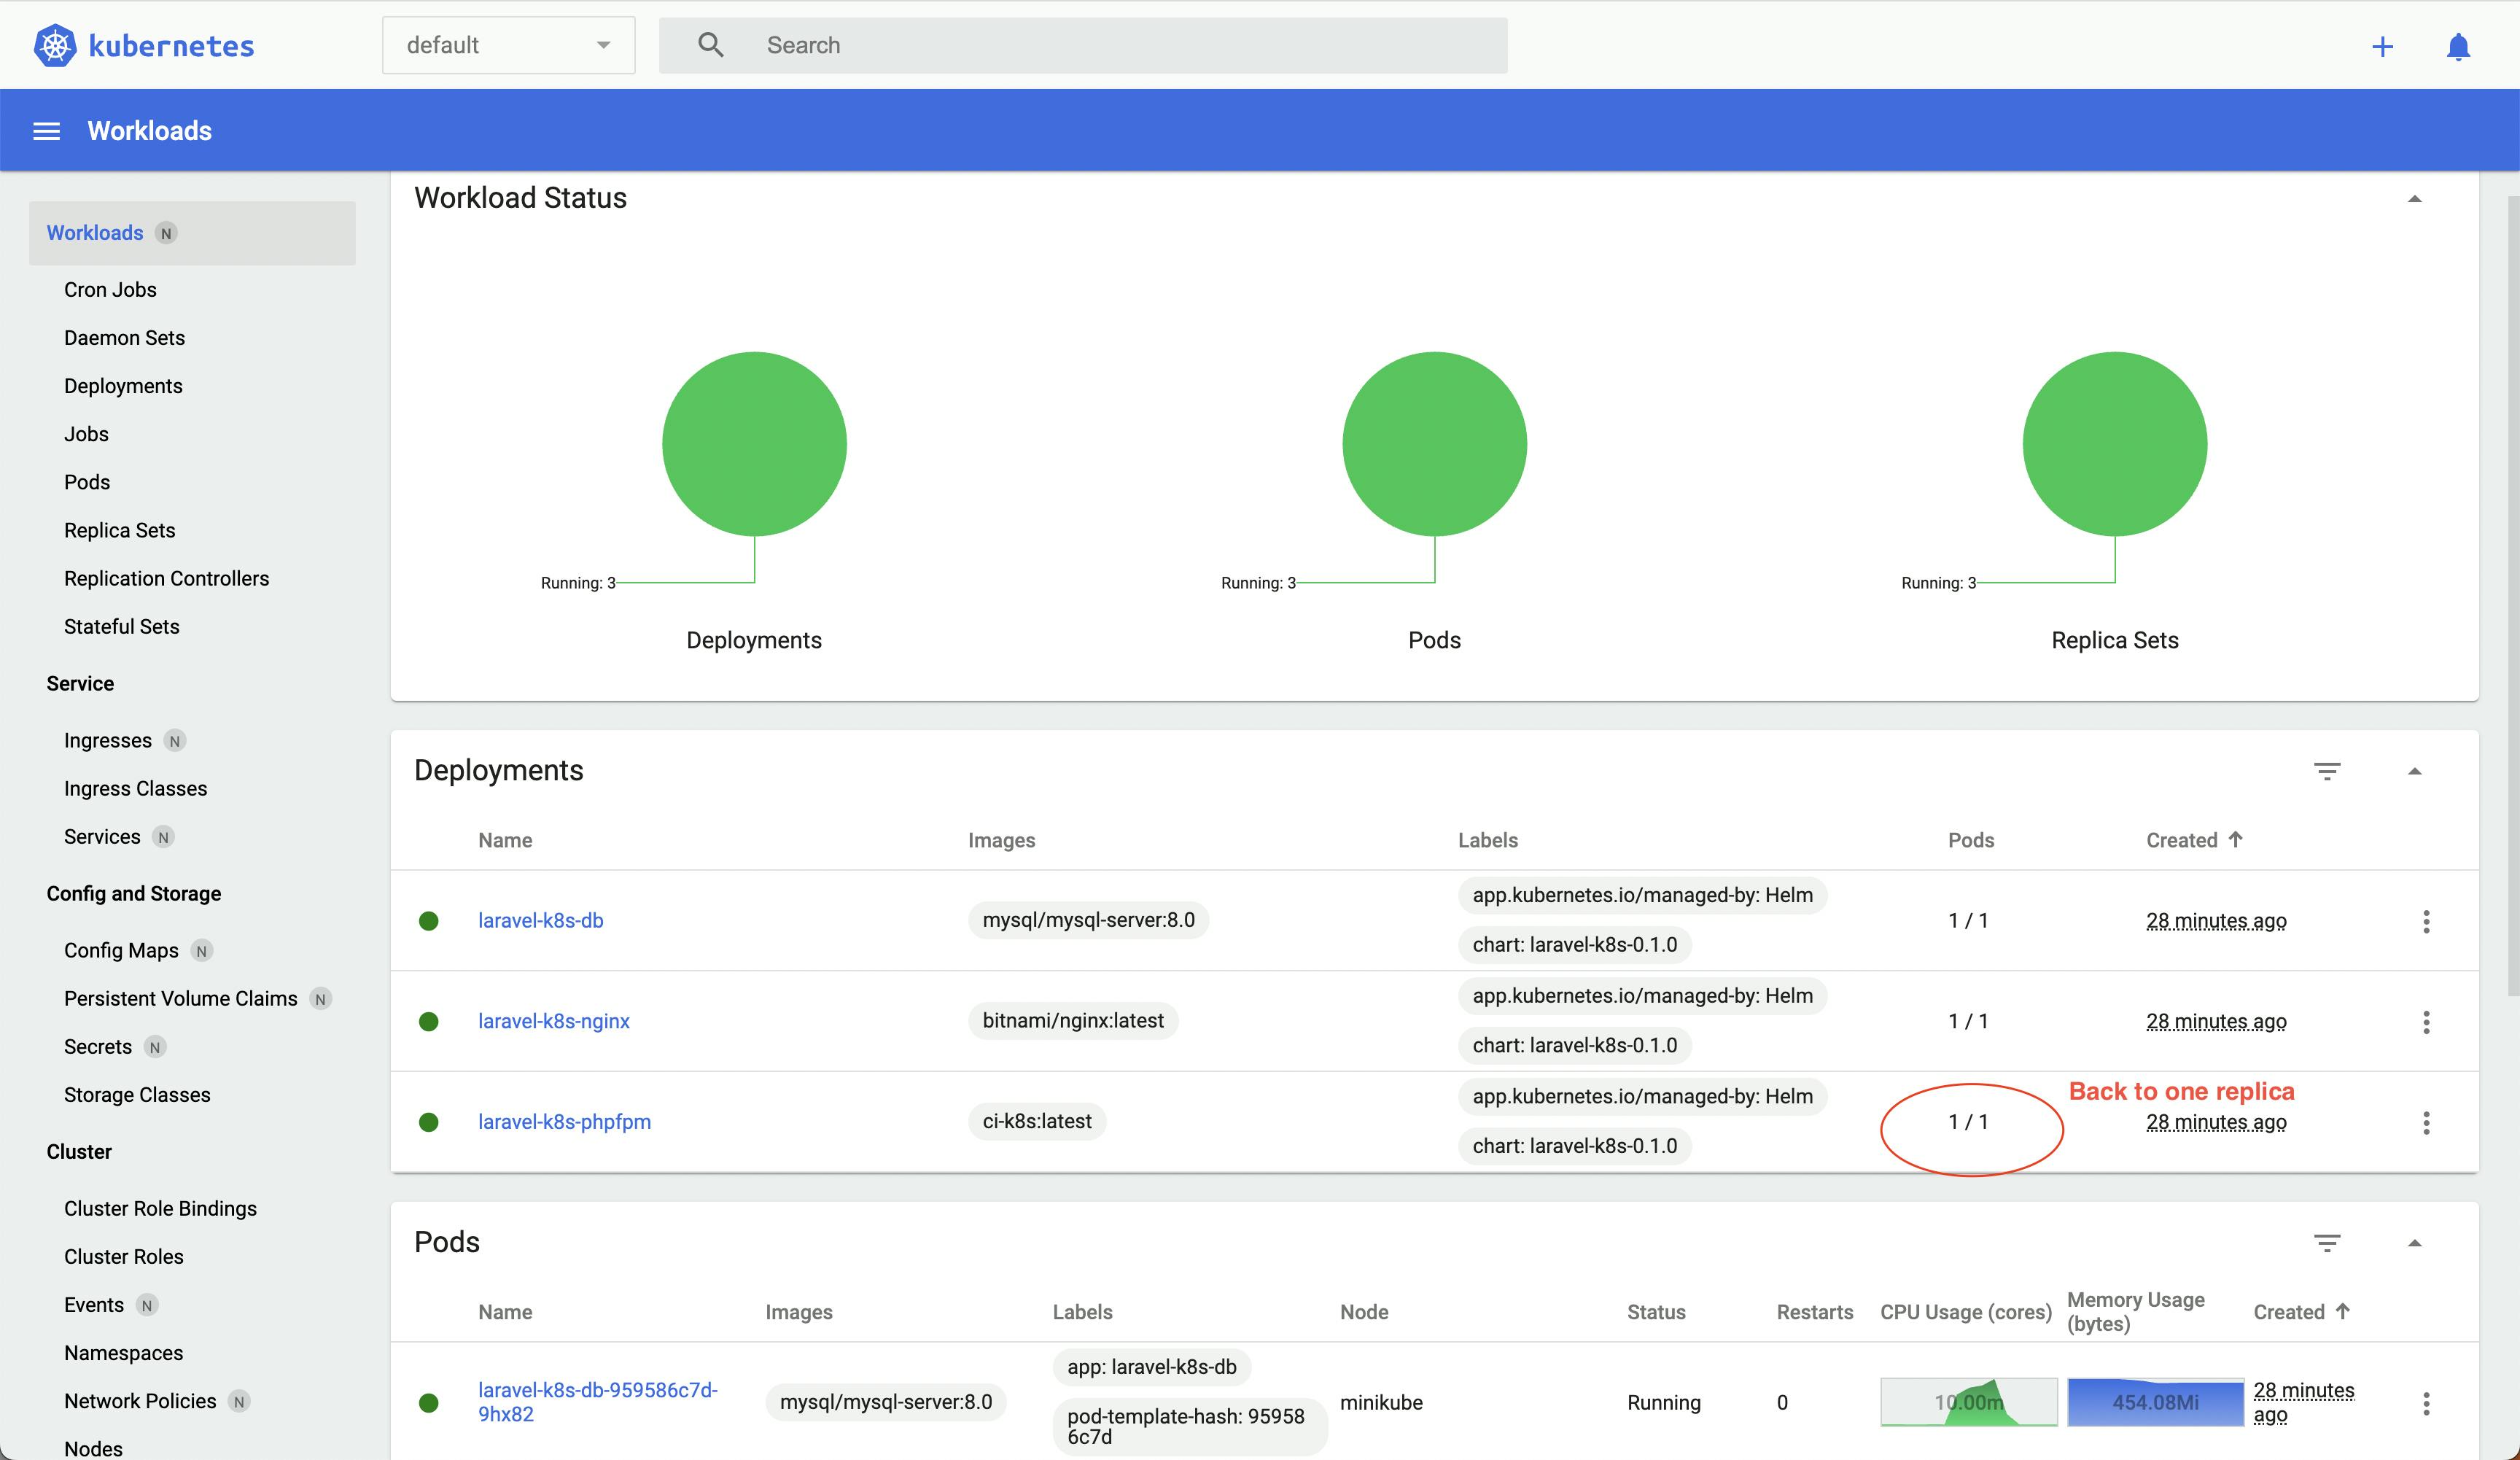
Since it can automatically scale, once it sees that the resource consumption in a pod is within the threshold, it will destroy the newly created pod.
Debug Incorrect Templates
Helm provides many ways to find the issue in incorrect templates. In this case, execute the below command:
helm template --set dbRootPassword=$DB_ROOT_PASSWORD --set dbName=$DB_NAME --set dbUser=$DB_USER --set dbPassword=$DB_PASSWORD --set apiKey=$API_KEY laravel-k8s chart/ --debug > test.yaml
The YAML content will be output in the test.yaml file. You can find the issue from there.
Conclusion
You learned the power of Kubernetes to make your applications ready to serve traffic and how cost-efficient it is.
It will reduce the number of pods based on traffic. You will choose between EKS, GKE, AKS, etc. when it comes to production.
A few things, like the dashboard, might be different, but most of the processes we undertook in this blog will stay the same. Try it out, and let us know how it went!

