


What Is Jest?
Jest is a JavaScript testing framework that offers a set of tools to make software testing simpler. It includes a test runner that takes your code and expectations about its result, and during execution, it compares whether the result matches the expectations you had initially provided.
React Testing Library
React Testing Library is a lightweight solution for testing React components. It provides utilities for querying the DOM of React components, allowing developers to test their components in the same way actual users would.
Besides importing Jest and DOM, it also supports custom Jest matchers. The library works with React Hooks, Classes and can also be used with Regex.
Setting Up Jest With The Rust Compiler
Since the release of Next.js 12, Next.js now has a built-in configuration for Jest. To set it up, install the required packages by running the following:
yarn add -D jest jest-environment-jsdom @testing-library/react @testing-library/jest-dom
Now, create a jest.config.js file in your project's root directory and add the following:
jest.config.js
const nextJest = require('next/jest')
const createJestConfig = nextJest({
 // Provide the path to your Next.js app to load next.config.js and .env files in your test environment
 dir: './',
})
// Add any custom config to be passed to Jest
/** @type {import('jest').Config} */
const customJestConfig = {
 // Add more setup options before each test is run
 // setupFilesAfterEnv: ['<rootDir>/jest.setup.js'],
 // if using TypeScript with a baseUrl set to the root directory then you need the below for alias' to work
 moduleDirectories: ['node_modules', '<rootDir>/'],
 testEnvironment: 'jest-environment-jsdom',
}
// createJestConfig is exported this way to ensure that next/jest can load the Next.js config which is async
module.exports = createJestConfig(customJestConfig)
Under the hood, next/jest is automatically configuring Jest for you, including:
- Setting up transform using SWC
- Auto-mocking stylesheets (.css, .module.css, and their scss variants) and image imports
- Loading .env (and all variants) into process.env
- Ignoring node_modules from test resolving and transforms
- Ignoring .next from test resolving
- Loading next.config.js for flags that enable SWC transforms
Add the Jest executable to the package.json scripts:
"scripts": {
   "dev": "next dev",
   "build": "next build",
   "start": "next start",
   "test": "jest --coverage"
 },
You can add jest --watch which will re-run tests when a file is changed
Create Your First Test
Your project is now ready to run tests.
Let’s add a Button.test.tsx file to write our first test in /components/button directory.
Button.test.tsx
import { render, screen, fireEvent } from '@testing-library/react';
import '@testing-library/jest-dom';
import Button from './Button';

const defaultProps = {
 onClick: jest.fn(),
 text: 'Submit',
};

describe('Test Button component', () => {
 it('renders the component', () => {
   render(<Button {...defaultProps} />);
   const button = screen.getByRole('button');
   expect(button).toBeInTheDocument();
 });
 it('renders the correct text', () => {
   const { getByRole } = render(<Button {...defaultProps} text="click me" />);
   expect(getByRole('button')).toHaveTextContent(/click me/i);
 });
 it('calls correct function on click', () => {
   const onClick = jest.fn();
   const { getByText } = render(
     <Button {...defaultProps} onClick={onClick} />,
   );
   fireEvent.click(getByText(defaultProps.text));
   expect(onClick).toHaveBeenCalled();
 });
});
You’ll first render the Button Component, get a reference to the button, the only one in this case, and expect it to be present in the document.
Note: render also returns functions that allow you to select and manipulate DOM elements. In this case, we are using getByRole, which allows you to query nodes by their role.
We also checked that by clicking on the button called the onClick prop.
Here we are creating a simple Jest mock function and passing it as the onClick prop to the Button component.
We then use getByText to select the button this time.
With the node selected, we then call fireEvent.click, which is the declarative way of RTL firing events. All we need to do next is to confirm that our mock function was indeed called.
Button.tsx
import React from 'react';

const Button = ({ onClick, text }) => {
 return <button onClick={onClick}>{text}</button>;
};

export default Button;
Let’s Add Another One
Input.tsx
import React, { useState } from 'react';

function Input() {
 const [name, setName] = useState('');
 return (
   <div>
     <span data-testid="input-greeting">
       Welcome, {name === '' ? 'Anonymous User' : name}!
     </span>
     <br />
     <input
       type="text"
       aria-label="user-name"
       placeholder="Your name"
       value={name}
       onChange={(e) => setName(e.target.value)}
     />
   </div>
 );
}

export default Input;
We have an Input component for the user’s name and a greeting message that changes with the provided input.
Note: we are using React Hooks to manage the state. However, internal implementations shouldn’t matter at all.
Let’s add an Input.test.tsx file to write our next test in /components/input directory.
Input.test.tsx
import React from 'react';
import Input from './Input';
import { render, fireEvent } from '@testing-library/react';

describe('Test Input component', () => {
 it('displays the correct greeting message', () => {
   const { getByLabelText, getByTestId } = render(<Input />);
   const input = getByLabelText('user-name');
   const greeting = getByTestId('input-greeting');
   expect(input).toHaveTextContent('');
   expect(greeting.textContent).toBe('Welcome, Anonymous User!');
   fireEvent.change(input, { target: { value: 'Ummar' } });
   expect(input).toHaveValue('Ummar');
   expect(greeting.textContent).toBe('Welcome, Ummar!');
 });
});
We select the input via the aria-label attribute—an example of how the library enforces ideal accessibility practices—and also check that both the greeting and the input have the correct initial value.
Then, we call fireEvent.change to trigger a change event, ensuring we pass the correct event object with the new input.
Finally, you’ll need to assert that the input has the correct value and the right greeting is being displayed.
- You can access values and attributes as you would with regular DOM nodes. So getting an element’s text is as easy as accessing textContent.
- Nodes are passed as a reference. If you assign them to a variable before a change, you can use the same variable to check if any of its attributes have changed.
Setting Up GitHub Actions
Before adding new changes to your codebase, to check for any breaking changes, you would probably want to run your tests, right?
This is where GitHub Actions come in handy.
You can use GitHub actions to automate tasks that you’d like to be repeatedly run at specific events.
What Are GitHub Actions?
GitHub Actions is a testing environment provided by GitHub. It’s a workflow file that contains YAML formatted configuration of tasks to be run when an event occurs in the repository, such as the push event. This occurs when new files are pushed to the repository.
In our repository, inside .github/workflows directory, we have the main.yml file. This is a workflow file for GitHub Actions.
It is designed to execute the yarn test command whenever a push or pull_request event occurs.
.github/workflows/main.yml
name: CI
on: [push, pull_request]
jobs:
 test:
   runs-on: ubuntu-latest
   steps:
     - uses: actions/checkout@v3
       with:
         node-version: lts
     - name: Install modules
       run: yarn
     - name: Run RTL tests
       run: yarn test
Whenever the push/pull_request event occurs, it runs the build job on an ubuntu container (server). This job first sets up Node.js version lts and then it installs all dependencies by executing the yarn command.
Finally, we’ll run the yarn test command, which executes Jest tests.
Once the workflow file is checked in and a push event occurs on the repository, GitHub Actions will start the test job mentioned in the main.yml workflow file.
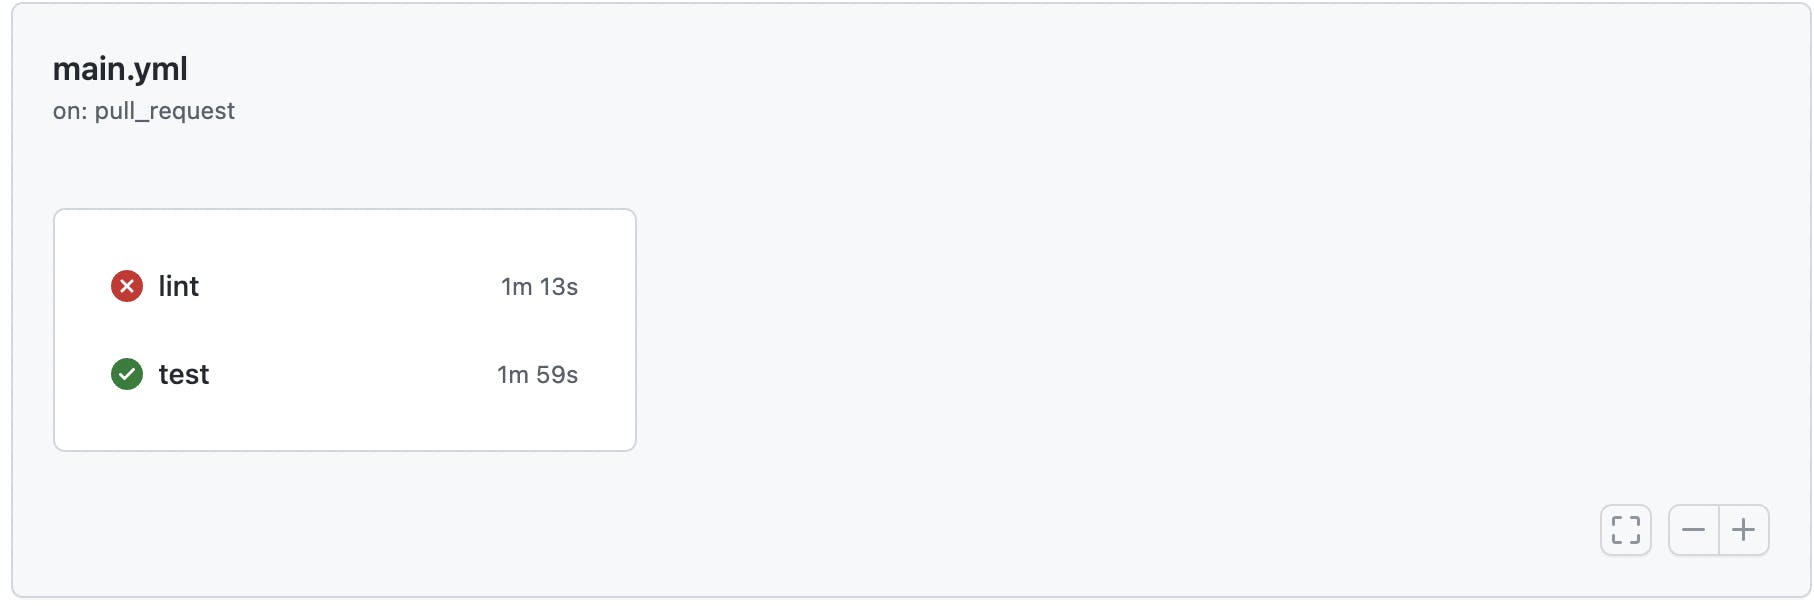
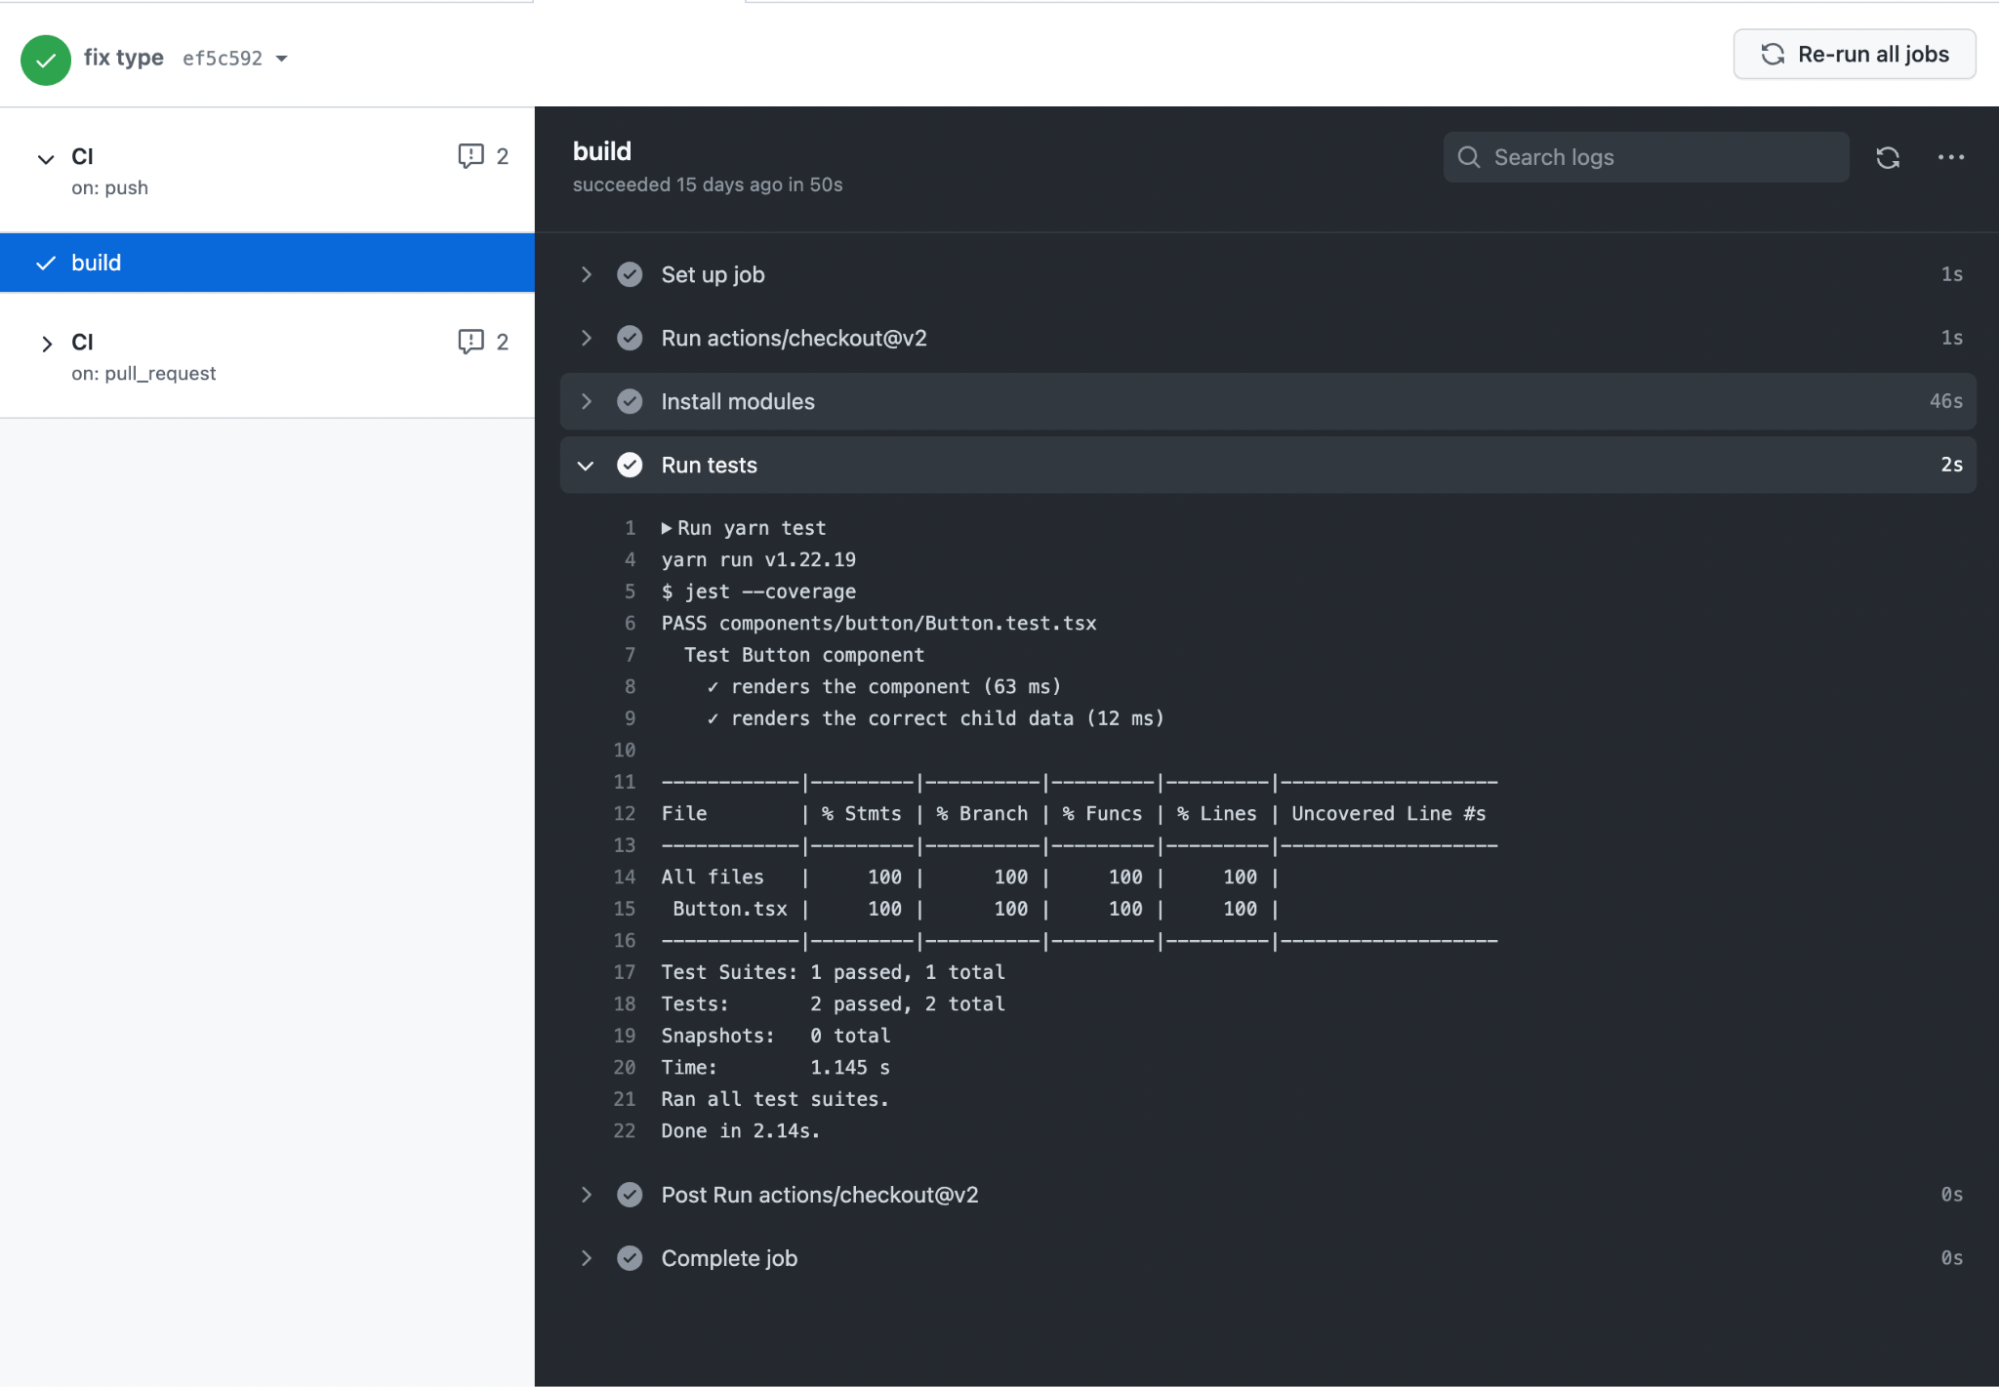 If the job was successful, you would get the green tick mark. If not, you will see a red cross mark.
Conclusion
We’ve successfully learned how to successfully set up the tools and infrastructure required for a robust testing and CI/CD pipeline in a Next.js application with:
Unit tests for React components using Jest & React Testing Library
Automated Triggering of these tests occurring on each push and pull_request
We hope you found it helpful!